You’ve chosen your project and gathered the essential tools — now it’s time to tackle one of the most important steps: REMOVING THE OLD UPHOLSTERY.
Done with care, this stage not only saves you from headaches later but also gives you a clear understanding of how your project was originally put together. Even better, the old fabric becomes your ready-made pattern for cutting new panels and reupholstering.
We start with the basics from our previous episodes – take photos of your work before you remove anything (the more the better!) and work in sections. Remove panel by panel, add your alignment marks and note how each was attached and overlapped. Label the pieces as you go (Panel A, B, etc.) so you’ll know exactly where they belong later.
USING THE RIGHT TOOLS IS ESSENTIAL so you don’t damage the material, frame or finishings that you may wish to reuse.
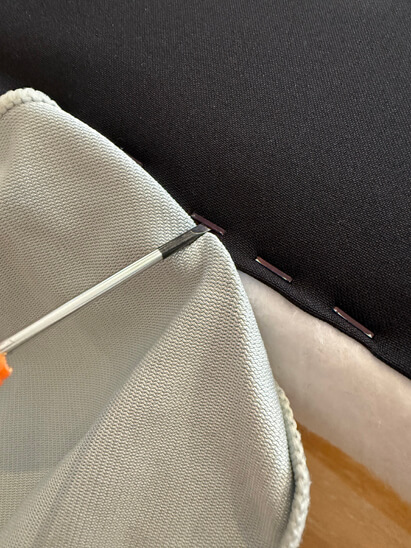
- Staple remover / tack lifter – Loosens staples and nails without gouging the timber
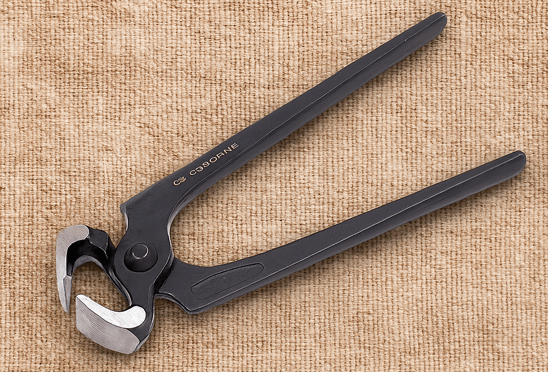
- Pliers / Upholster pincers – The curved edges let you gently rock staples or tacks loose
- Flathead screwdriver – Great for prying under trims or staples (go gently to avoid splintering the frame). A small rounded screwdriver causes less damage and scratches to the timber and finishings
TOP TIP: Place a small cloth underneath your staple remover when working on delicate timber frames. This reduces dents, scratches, and splintering.
PROTECT THE FRAME AND THE FOAM! Upholstery frames are often timber with glued joints/metal brackets that can dent or split if forced. Once the frame is cracked or weakened, it is hard to repair without replacing that section. If only the finish is damaged, you may need to sand back and re-varnish or colour-match the stain.
If the foam or padding is in good condition, preserve and reuse it. This not only saves cost but keeps the shape authentic to the original design.
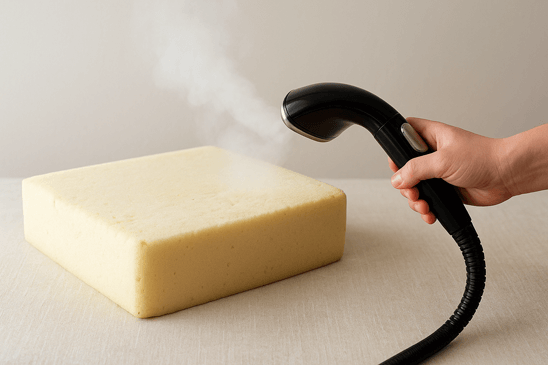
TIP: If your foam is in good condition but has flattened or lost its shape, you can use a garment steamer. The heat and moisture penetrate and expand the compressed foam cells, reviving the original shape.
KEEP THE OLD FABRIC AS A TEMPLATE — don’t throw away those old, worn panels! Even if they look tired, they hold the exact shape, seam placement, and size for your new fabric. You can use them as cutting templates when you’re ready for reupholstery. We’ll explore this in our next episode.
TIP: Bag and label hardware (buckles, screws, studs, zips) as you go. Nothing’s worse than finishing a beautiful re-cover only to realise you’ve misplaced a critical piece of trim.
Stay tuned for EPISODE 4, where we’ll dive into Using Old Fabric as a Template.