Let’s start at the very beginning … You have a project you would like to reupholster or a single panel/section of material you need to replace. What do you do first?
It might sound simple, but this step will save you hours of time, effort, and uncertainty—in worst cases, taking your project apart just to put it back together. The secret?
Photograph and mark your project
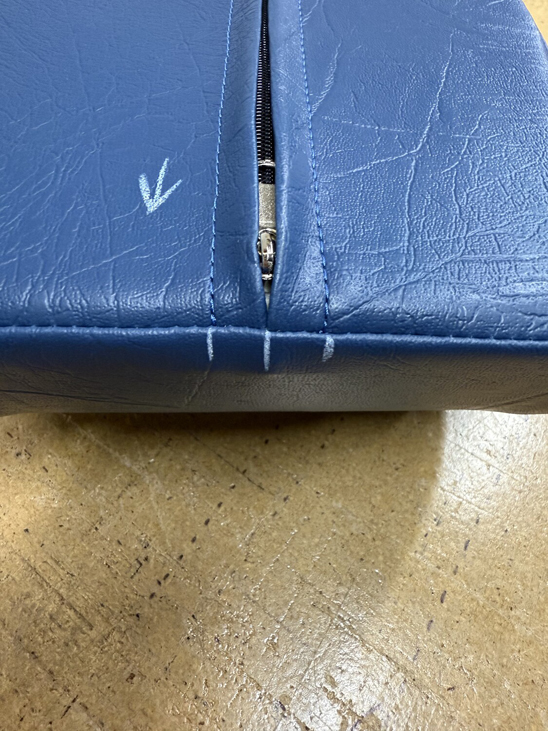
Marking the zip direction and alignment
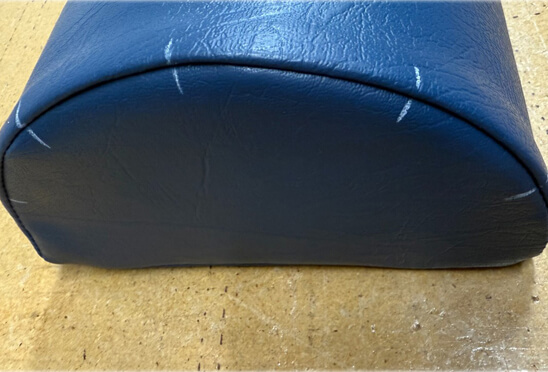
Step 1: Before you touch a seam or pull a staple, take detailed photos!
A full set of reference pictures will help you:
- See how the project looks assembled
- Identify where seams run, whether they’re hidden, which way the top stitch is folded
- Record the direction of the zip and where zips start and finish
- Document details like trimming, fasteners and decorative trims
- For complex areas, take close-ups from multiple angles. This has saved me countless hours of trial and error when my memory decided to take the day off! Plus, you’ll have great “before and after” shots when you’re done!
Step 2: Mark your project, the more marks the better!
This technique allows you to ensure precision when removing and reassembling sections of your project and gives you a step-by-step logical guide—no second guessing.
Here’s how…
- Draw alignment marks before you take the project apart. Use chalk, a marker, or a white pencil to make small marks across seams, zip ends, and key intersections.
- When cutting new panels, transfer those marks to the new fabric; make sure these can be removed or aren't visible after construction.
- As you sew, line up your marks to maintain seam integrity. This is especially important when attaching new fabric to old, as seams can stretch or shrink during the process. If alignment is off, gently stretch the fabric toward the mark to realign.
Step 3: Label your sections
For larger pieces or projects with multiple panels, label them clearly:
- A–B, B–C, or Panel A, Front, Back, T (Top) etc.
- Note special features: buckle positions, studs, zip direction, or decorative finishes.
- We use this method daily in car trimming—especially when replacing seat panels—and in furniture upholstery. Having each piece clearly identified means reassembly is almost effortless.
By following these steps, you’ll dramatically reduce errors and ensure your new cover or panel fits almost perfectly. This is a method I use on every single job—big or small.
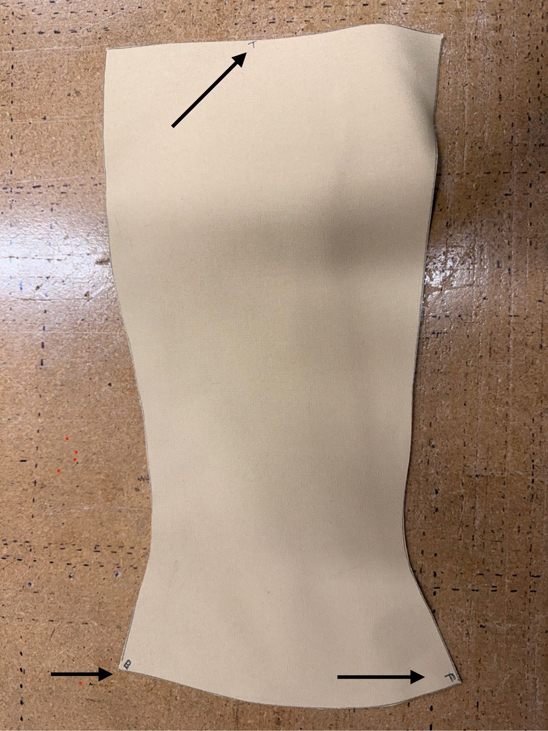
Marking Front, Back and Top on a canvas upholstery panel
Recommendations: My favourite marking tool
While chalk or standard pencils work fine, my personal favourite is the Stabilo All Water Soluble White Pencil.
- Produces bright, clear markings.
- Won’t fade during handling.
- Removes easily with water and a soft cloth once the job is complete.
- At around $6 each, they’re pricier than standard pencils, but worth every cent. I won’t use anything else.